Tuesday, June 25, 2013

Pinspired Challenge #12


Pinspired Challenge #12 starts today and here is the pin we are working with:

I love this aqua and red color scheme, and since we are so close to July 4th, I decided to make a patriotic card. We attend a large family party every July 4th, so I thought this would be a good card to thank the hosts.  

SP & Company is returning as our sponsor for this challenge and they are offering the winner TWO free (in stock) stamp sets-winner's choice!  

Head on over to the Pinspired blog to see what the rest of the design team made and to enter this challenge.   We can't wait to be "pinspired" by you!


Thursday, June 20, 2013

What We Made: Hand Carved Stamps


You all know that I love stamps, right??!  So, when I started seeing some hand carved stamps on Etsy and Pinterest, I knew I had to give it a try.  Below are some of the first stamps I have carved.  Some of them aren't so great...no laughing! :)  I started out carving on Pentel Hi-Polymer Erasers.  If you decide to give this a try, get this brand!  I tried another brand because I thought any eraser would do, but the other brand was way too crumbly and did not carve well. You can find the Pentel erasers at Target, Wal-Mart, etc.  You can also buy a rubber carving block (made for carving stamps) by Speedball at Hobby Lobby or Michaels, just don't forget your coupon! The carving blocks are larger and work well for carving larger stamps.  You will also need a linoleum cutter to carve the rubber.

Here are some of the stamps I have carved.  Most of mine are solid images because that is easier to start out with.  I have carved one line image, and it turned out O.K., but it is hard to get the thin lines to turn out right. Hopefully with more practice it will become easier.  


There are several online tutorials you can view, and several bloggers who are extraordinarily skilled at carving stamps.  A few I like are:


I also purchased two books on the subject, because this is something I have wanted to do for awhile, and something I hope to get better at.

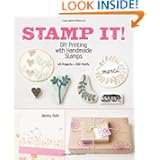
This first one is full of stamping techniques, project ideas and templates to carve your own stamps .  If you are already a stamper, most of the techniques will already be familiar to you, but it does include a tutorial on carving your own stamps. 
Product Details

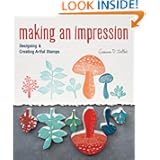
  This book, THIS BOOK,  is beautiful!  It is full of project ideas not only for stamping and carving your own stamps, but also for using your stamps in embroidery projects.  It is full of beautiful photos, beautiful projects, and includes tons of templates to carve your own stamps.  It includes a tutorial on carving your own stamps as well.  I included a link to Geninne's blog above. She is an amazing artist!

Product Details

I purchased both of these books at Amazon.com.   Let me know if you give this a try!

Wednesday, June 12, 2013

What We Made: String Art


I mentioned a couple of posts ago that the kids and I were going to try a few different art projects this summer.   The first one we tried was string art.  You can find a complete tutorial and list of supplies here:

I asked the kids what shaped they would like to use, and then did a google search to find a template we could print.  Once you have chosen a shape, make marks at even intervals around the outline of the shape.  This is where your nails will go.   Once your template is marked, lay it on your plaque and hammer the nails in place.  The hardest part of this project is getting those little nails to go in straight!  If a few of them are a little crooked, it doesn't matter-trust me!

Once the nails are in place, remove the template.  You will have to rip it to get it off, so it cannot be used more than once.  
The tutorial calls for waxed cord, but we just used some thin crochet thread.  You start off by tying your string to one of the nails, and then going around the outline of your shape looping the string around each nail. Once you are back to where you started, it is time to fill in the center of your shape by looping the string around different nails either in a pattern or going back and forth randomly.  The three below were done in a pattern and the feather was done randomly. (for a better idea of how this is done, see the tutorial I listed above)

 Our finished plaques:


The feather below didn't turn out so well.  I think the shape was too complicated for this type of project.  My advice is to use a very simple shape, or if you want to use a more intricate pattern, plan on using a bigger plaque. The plaques we used were 5x7 and 5x5.  

A fairly simple project, with a really fun result!  Stay tuned, our next projects include hand carved stamps and print making!


Tuesday, June 11, 2013

Pinspired Challenge #11

It's time for another Pinspired Challenge, and this one begins with the lovely photo below!

When I see this photo, I automatically think wedding!  So I used the flowers and colors as inspiration and made a wedding card.  I used the flowers and sentiment from Avery Elle's new stamp set titled Oh Happy Day.  The purple banner stamp is one I hand carved (I'll tell you more about that another day!).  Very simple card, but perfect to pull out for someone's special day!

Our sponsor for the this month is S P & Company.  They are offering the winner of this challenge a $20 gift certificate to their online store!

To enter this challenge and to see the rest of the design team's projects, head on over to the Pinspired Challenge Blog.  We can't wait to be "pinspired" by you!